I'd been having some trouble with Overdrive on my very abused Rock Band guitars -- to the point where one of them (an original RB1 unit) all but quit working altogether.
I took it apart to see what could be done, and was surprised to see that the tilt sensor actually used little metal balls in a can (this is why the guitars rattle when you shake them). It used two of the sensors wired in series, probably to better filter false positives caused by vibration.
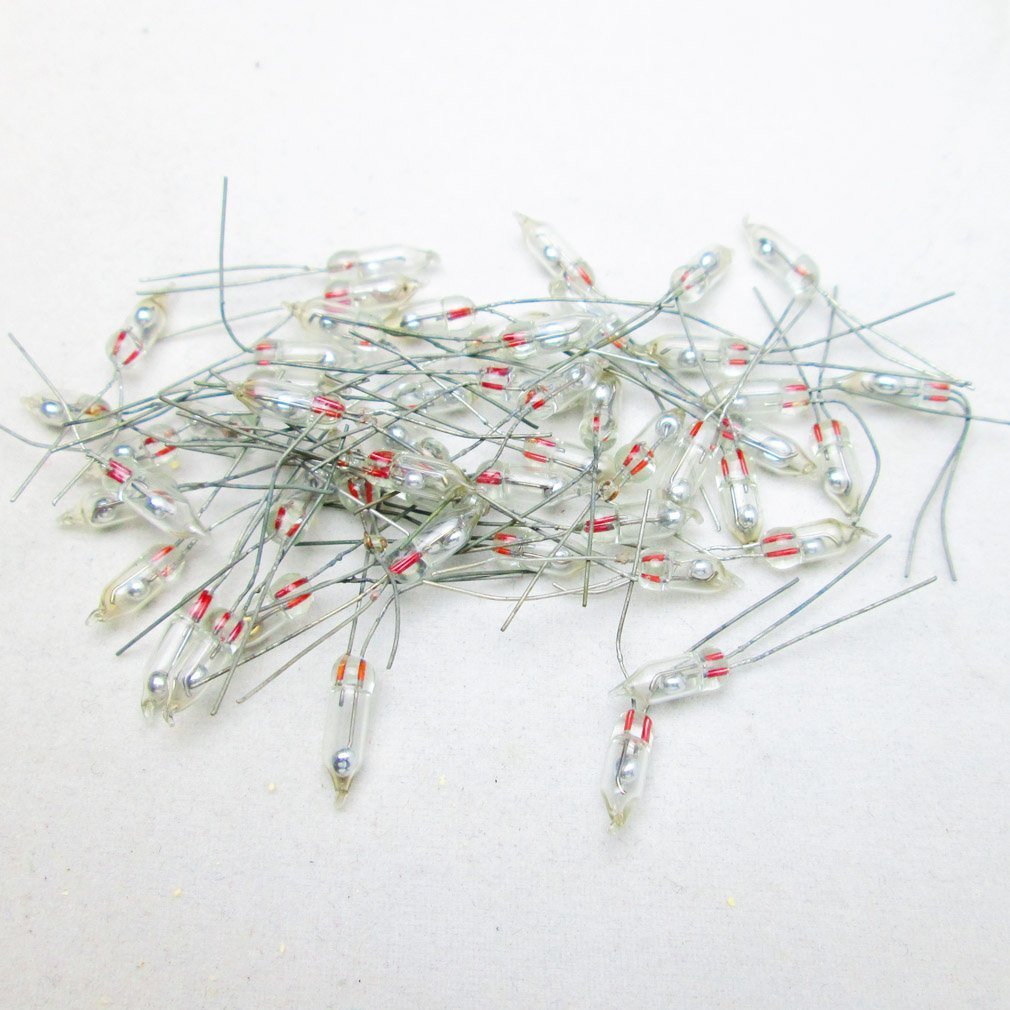
Sensors used were similar to this: https://www.adafruit.com/product/173

Some testing suggested that one of the sensors was barely responding at all anymore, so to get it going, I shorted one of the sensors out, so that only the other one was needed to trigger. This only sort of worked and got us through the evening.
I ordered a set of mercury tilt switches to replace them. I got a set of 10 little ones from Amazon for $6, so I could install two in each of my guitars. https://www.amazon.com/gp/product/B00M1PNBTE/ref=oh_aui_detailpage_o01_s01?ie=UTF8&psc=1
Since this is the internet, obligatory warning. Mercury is a toxic metal that can be absorbed. If you break one of these, it will be hard to safely clean up. Don't bother if you don't know why that matters.
I had two guitars I needed to update - a Rock Band 1 and a Rock Band 2 -- there are obvious external differences, and a number of internal ones. I'm only interested in the tilt switches here. In this case, Rock Band 2 upgraded the tilt sensor. It still uses the ball bearing type of sensor, but it used two larger sensors (heavier balls), and it wired them in parallel instead of series (so that EITHER switch could trigger it). It then went one further than that and added a port to the side of the guitar so you could plug in an external foot switch for overdrive - this is also wired in parallel.
Testing showed that the ball-based tilt sensors worked, but the connection was iffy. It was bouncy and imperfect. The mercury tilt switch, by comparison, works by immersing two contacts in conductive liquid metal. The connection, compared to the ball switches, was pretty much perfect and very low resistance with no bounce.
So for the Rock Band 1 guitar, it was a straight remove-and-replace. With the switches being so much better I wanted to keep the series connection so that just shaking or bouncing the guitar was less likely to generate an accidental overdrive. I then bent the leads to get the approximate angle I wanted the switches to trip at.
For Rock Band 2's guitar, the switches were wired in parallel. Again, Because I liked the idea of the series connection providing resistance against false triggers, I tied two of the leads together and wired that up, after insulating the PCB to prevent shorts. This gave me a series connection on that guitar as well.

When I went to install them into the guitar, I hit another small snag... the normal orientation of the guitar meant that the switches lay flat instead of tilting, which made them trigger too easily.
Fortunately, the boards mount by means of a slot and are held in with screws with a very wide head. Friction meant I could just lay the board flat on the mount and screw it into place like that -- this worked fine.

And there we go! Hooked it all up and it seems to be working just fine! I probably should have replaced the reed switches while I was in there, but we'll do that next time. ;)
No comments:
Post a Comment